Do you know the feeling of finally going through your travel photos, only to discover that they don’t capture the adventures you just experienced? The images might look dull and gray, the contrasts too harsh, and those majestic mountains appear flat and small.
I know that feeling!
That’s why, some years ago, I decided to commit myself to learning how to really take photos.
Learning to capture amazing travel photos is a slow process, and even after years with a good camera in hand, I’m still learning the craft. But I have learned a few things over the years, and here are some of the tips that helped me get started and create more striking travel photos.
So, what’s important when you’re traveling and want to capture your experience in a photo?
There are many factors that come into play when you want to take amazing travel photos. A great shot is made up of subject, light, composition, engagement, creativity, planning, and a healthy dose of luck and serendipity.
Here are my 10 tips for capturing your best travel experiences. First and foremost:
1. Get to know your camera!
I used to have a digital camera, but I have to admit, I rarely used it. I was often disappointed with my results when I got home and looked at the photos. Looking back, I now know part of the problem was that I shot everything in “Auto mode.” I relied on all the preset settings, and my photos often turned out blurry, shaky, and a bit dull. Honestly, it was a bit of a waste of a good camera to use it that way.
When I got my new digital camera, I took the time to learn how to control the shots myself. For example, I can now choose exactly what to focus on and play with the light. Over time, I’ve developed my own unique photographic style.
The way I learned my camera was by watching thousands of YouTube videos that showed me what to pay attention to in order to take a great photo. I also looked for videos and articles specific to the camera I was using. But most importantly, I just kept shooting. I almost always had my camera over my shoulder and snapped away wherever I went.

By shooting freely in all kinds of situations, I got a feel for my camera and its functions. I also began to sense what was needed in light and dark, in fast or slow motion, and how to use focus to “tell” more with my photos.
2. Shoot during the blue/golden hour
I’ve often stood in front of the most stunning scenery, only to take the dullest photos! I’ll be honest – it was usually because I wasn’t paying attention to the light. Many of my shots turned out flat, washed out, or overexposed because I was photographing when the sun was highest in the sky. This was especially true on my trips south, particularly near the equator.
The soft, warm light during the hour after sunrise and the hour before sunset softens shadows and gives your subjects the best chance to stand out in photos.
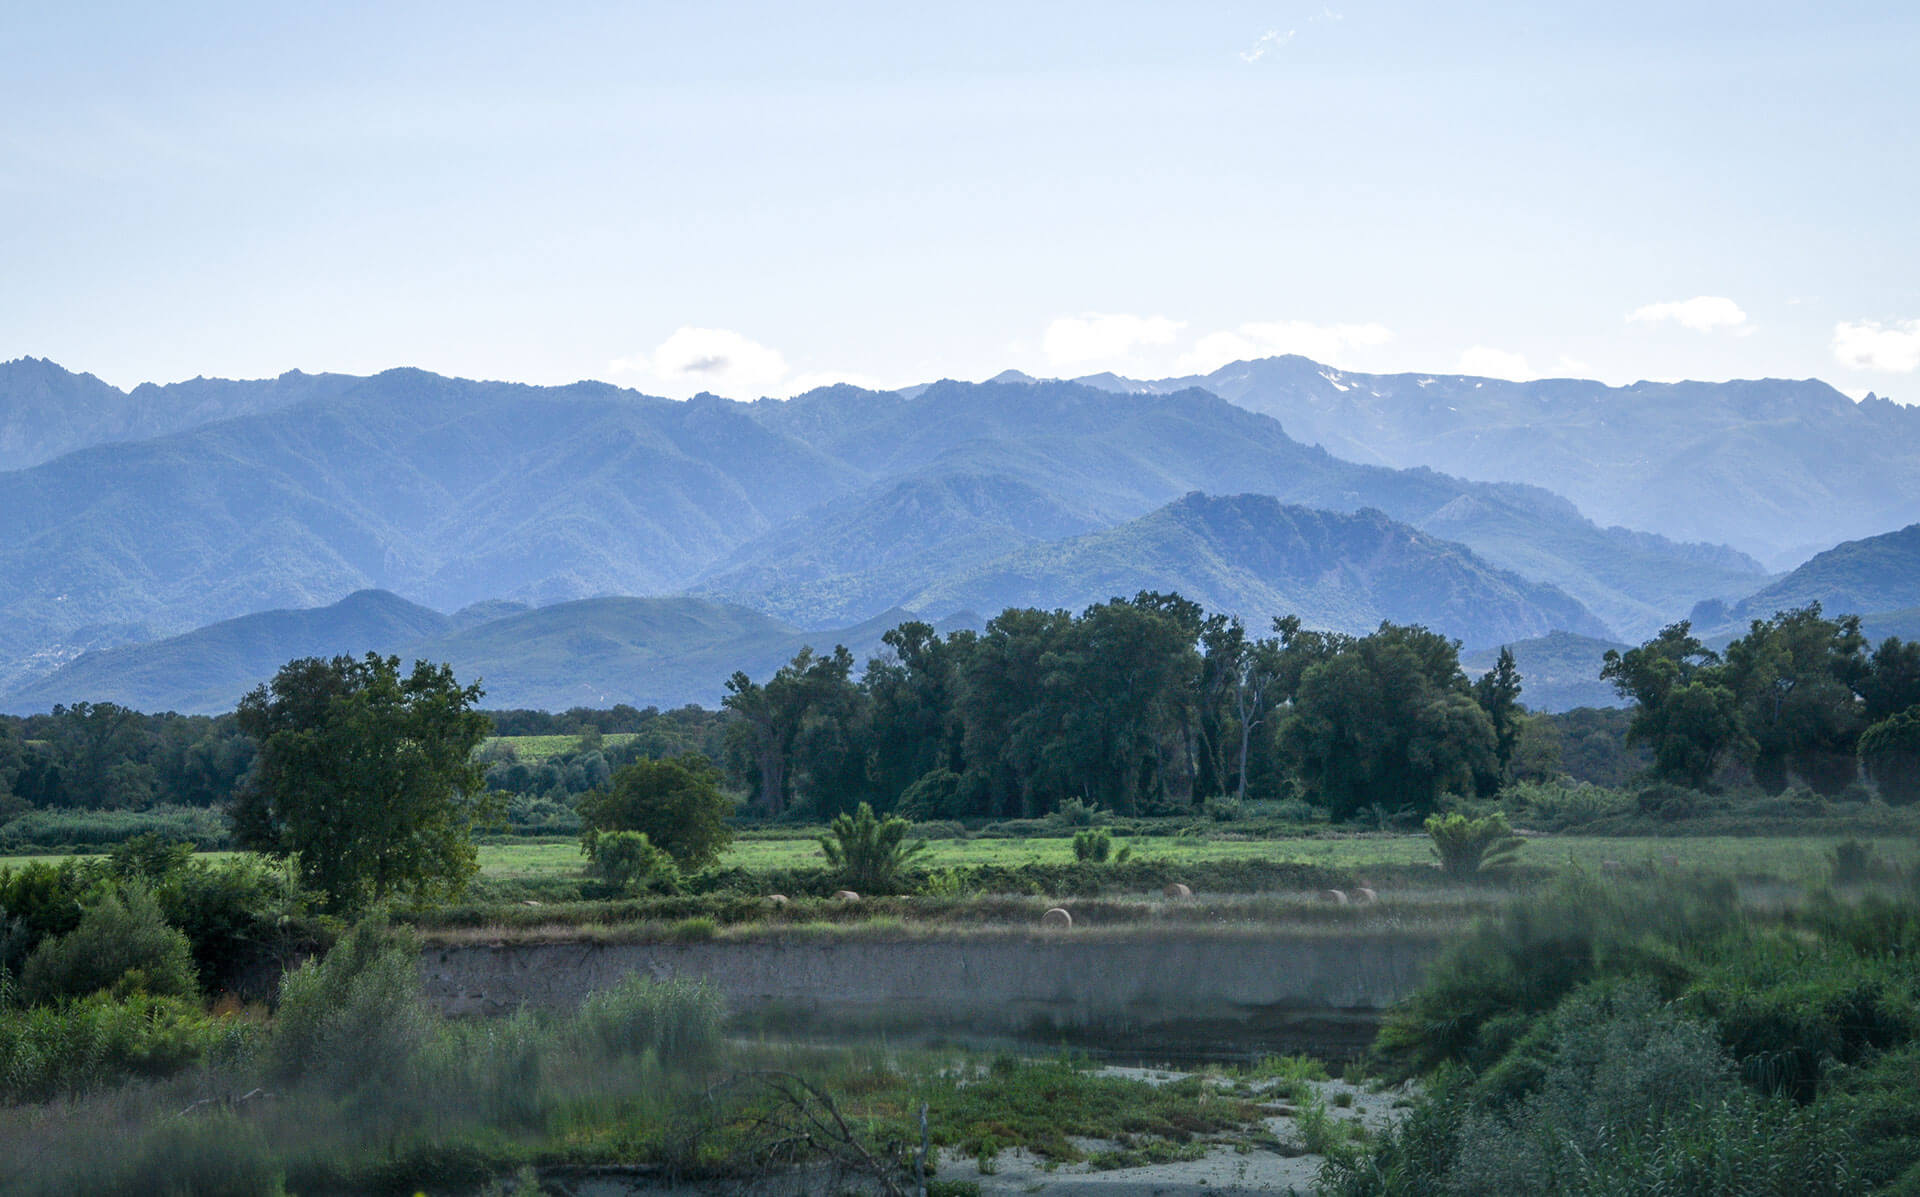
Get up early, feel the atmosphere, and capture the most beautiful images in that gentle light – or wait until the sun nears the horizon at sunset. The photo below was taken in Corsica, just before sunset. The colors turned golden, and the shadows are soft in the golden hour.

The photo below shows Peter and Sebastian, a little later, after sunset, gathering grass for the horses. The golden tones have shifted to cooler, bluish hues – but the shadows are still soft.

3. Create foreground, middle ground, and background
Have you ever tried to photograph a beautiful sea, only to find the photos look dull once you get home? It might be because the image lacks a focal point that guides the viewer’s eye. By including foreground, middle ground, and background, you help the viewer understand the scene and what’s important in the story of the photo (what you experienced in the moment).
For example, in a beach photo:
-
The foreground could be stones or rocks
-
The middle ground could be the sea and its waves, maybe with swimmers
-
The background could be a ship on the horizon
In the photo below, I chose to include Sebastian’s shoulder in the frame to create perspective. The focal point is still the man in the center, but he becomes part of a story because there’s foreground, middle ground, and background for the viewer to engage with.

4. Let the “Rule of Thirds” guide you
The “Rule of Thirds” is a principle that has helped me a lot in taking better travel photos. The idea is to create balance and harmony in your images. Imagine dividing your photo into three horizontal lines and three vertical lines, creating nine equal sections. Try to place your elements where the lines intersect, or along the lines themselves.
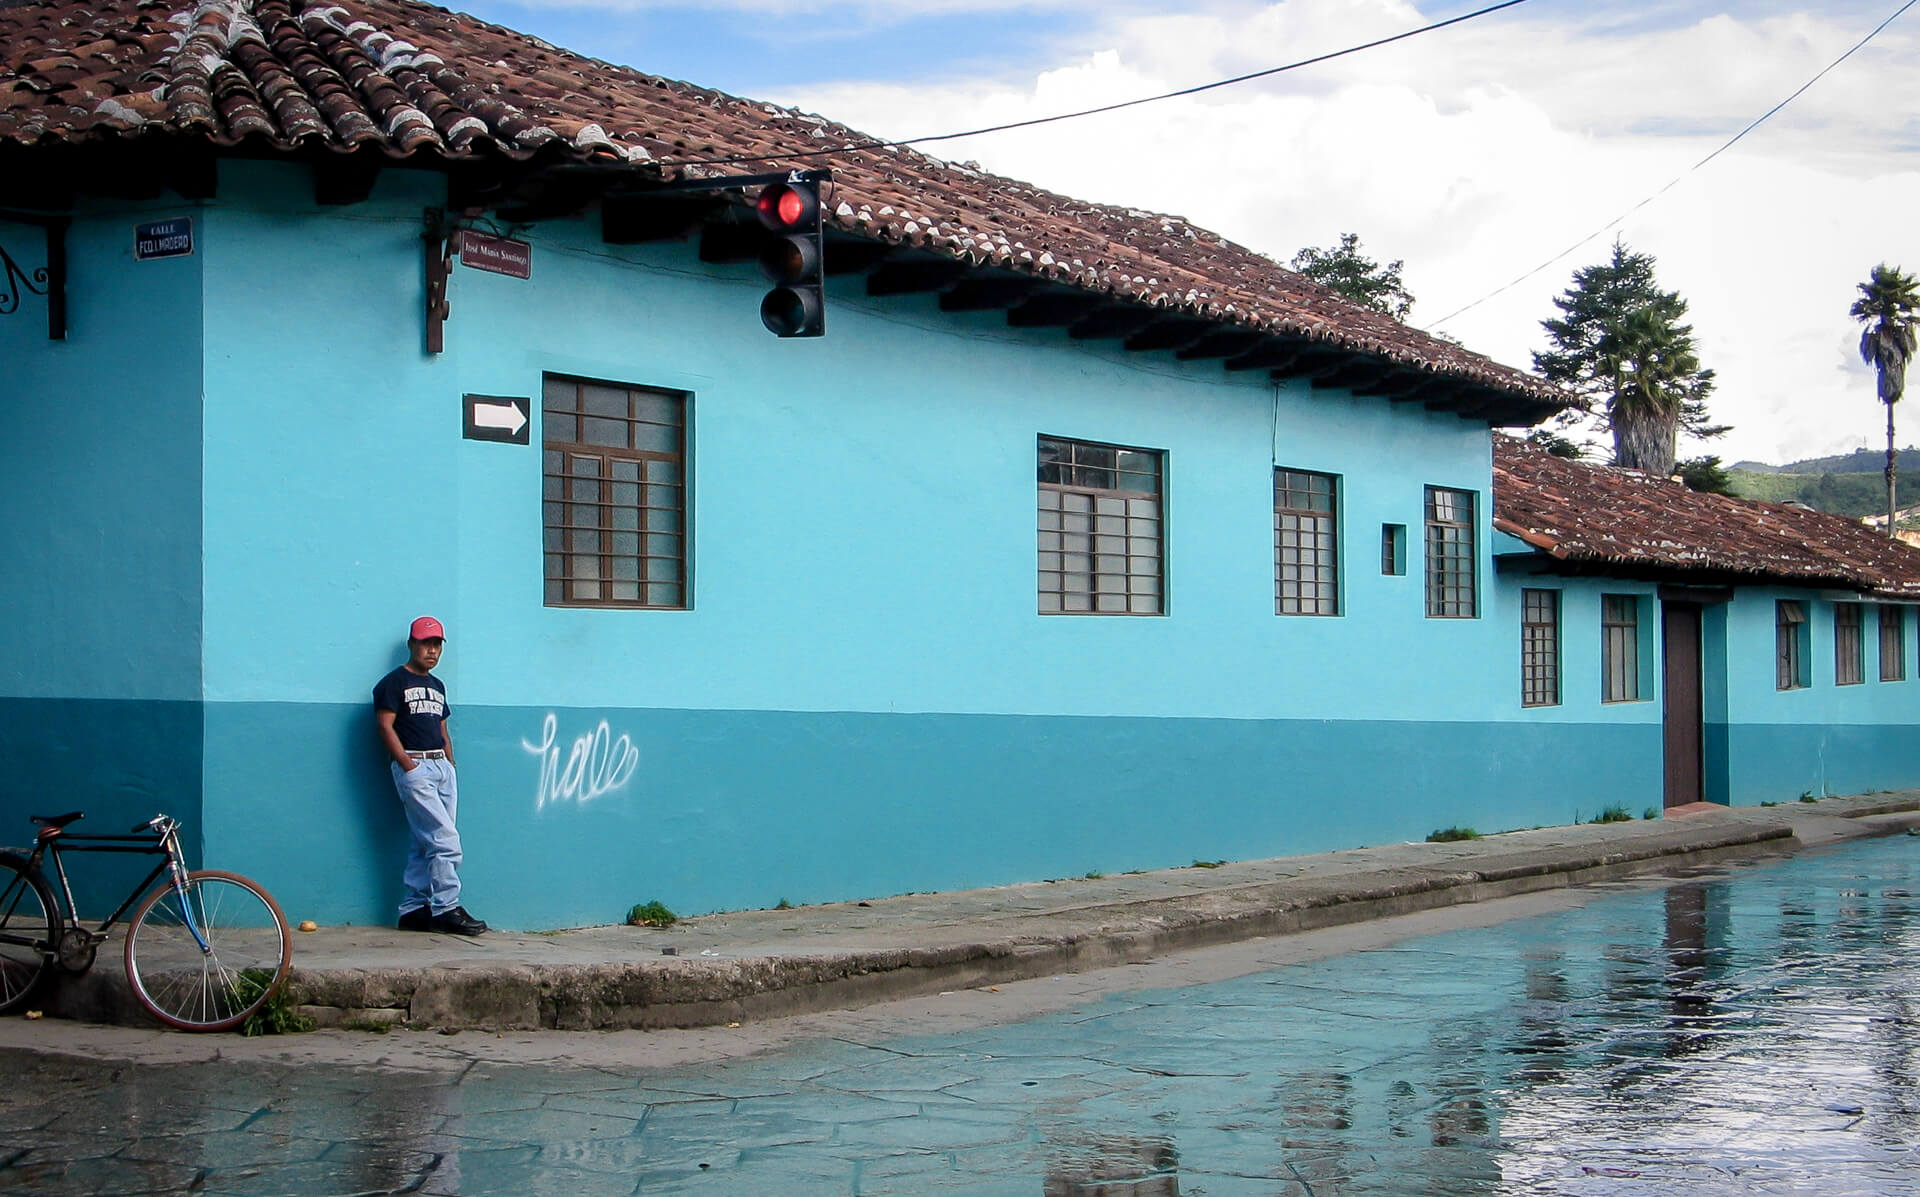
In the photo below, the Rule of Thirds is at play. The white line meeting the pink line on the wall doesn’t match perfectly, but the man’s forehead comes very close to the intersection of the axes.
Remember, the Rule of Thirds (and other principles) are not strict rules – they’re guides to keep in mind while shooting or to help you compose your image during editing.

5. Move around your subject
Even if your camera has a zoom, it’s still a good idea to use your body to move around what you want to photograph. Take shots from different angles and experiment – you might be surprised at how a subject looks from perspectives you don’t normally see.
For example, you could photograph flowers from below or shoot your children at eye level. Ask yourself: How does this usually look, and can I capture it from a new angle?
How many people haven’t photographed London Bridge in London? In the photo below, I moved behind Peter to capture him in the act of taking pictures with his phone. This gave me a more unique and interesting shot that tells a story.

6. Focus on the eyes
Yes – a simple tip, but photos of people and animals are always most expressive when the eyes are sharp and clear. This means you don’t focus on the paws, ears, or nose – but on the eyes!
This cat in Marrakech was resting in a large planter and was absolutely adorable. I took the photo while focusing on its eyes. Sometimes one eye is enough; other times I focus between the eyes.

7. Take Your Time
It’s not always possible – I know, we travel with a boy whose patience can sometimes be very short when we’re out exploring. But it’s the time you give yourself and the photo that helps you notice the details you might otherwise miss – and, most importantly, allows you to be ready when the perfect moment arises.
Below is a photo of two boys playing on a rooftop in Marrakech, Morocco. By giving myself enough time to take many shots of the boys, I captured the perfect moment when one of them spotted something exciting and showed it to the other.

9. Magnify the small adventures
Some things can seem dull when compared to everything else around them – sometimes they even disappear completely. But when you get close or zoom in, they take on new adventures. This could be the petals of a flower, fruits and vegetables at a local market, the food you enjoy at a café, and much more.
Below, you can see lotus seed pods from a local market in Chiang Mai, Thailand.

8. Shoot in RAW
When you take a photo, your digital camera can save it in different formats. One format most people know is JPG, which is a compressed file that doesn’t take up much space on your camera. JPG images are processed and, unfortunately, a bit flat and less detailed.
If you set your camera to save images as RAW instead, you get a file that contains all the data from the photo. This means you can edit your images and bring out colors and details that a regular JPG can’t.
RAW files can take up a lot of space on your memory card, but they give you the most to work with when editing your photos later.
Is it really that important? It is, if you want to create amazing moods and tell stories with your images. And isn’t that exactly why you take photos – to share your stories and experiences?
10. Don’t be afraid to make mistakes
There’s no reason to hold back on photos. Sometimes, it’s the shot you thought went wrong that turns out the best. Forget trying to get everything perfect from the start. Make mistakes – lots of them. Learn from them. Adjust, experiment, and you’ll be sure to capture both adventurous and amazing travel photos.
I still make mistakes. I still come home with many photos that never see the light of day, simply because it can be hard to take enough shots when traveling as a family. But it’s a choice, and for me, family and the experiences come first. For you, if you have the time – or can make the time – go all out and don’t be afraid to make mistakes. It’s through your mistakes that you learn to take the best travel photos.
I hope my tips help you take the most amazing photos on your travels.
Have fun!